I have only ever used Apache Derby (or Java DB as the version distributed with the JDK is called) in its embedded mode. But then a friend recently told me that he is running it not only in client/server mode but also as a Windows service! This post is about how I recreated that setup with instructions from him.
Let me first list all the tools that I used:
- JDK 8 (I have update 101 installed) – this includes Java DB
- Procrun from Apache Commons Daemon
- NetBeans (optional) as a user friendly way to interact with the database, to make sure that it is up and running
Manually Starting Client/Server Mode
First of all, it is a good idea to enable some kind of authentication. To do this, create a file called derby.properties in the %JDK_HOME%\db\bin folder with these properties (obviously specifying more secure passwords for real world uses):
derby.connection.requireAuthentication=true
derby.authentication.provider=BUILTIN

# Users definition
derby.user.sysdba=masterkey
derby.user.derbyuser1=password1
derby.user.derbyuser2=password2
Now we can start up the server from the command line:
[crayon lang=”text” wraplines=”true”]java -cp %DERBY_HOME%\lib\derbynet.jar org.apache.derby.drda.NetworkServerControl start[/crayon]
Creating the Database
Read the documentation here for more info about how to create a new database. Keep in mind that if you are using the Java DB installed with the JDK, which by default lives in C:\Program Files, you will need to start up ij from a command prompt with administrator access. If you don’t, it won’t have permissions to create files in the Program Files folder, and you will see an exception when you execute the commit command.
If you are following this step by step, go ahead and create yourself a database now. I called mine firstdb just like in the documentation.
Disconnect and exit from ij before trying to connect from another application such as NetBeans.
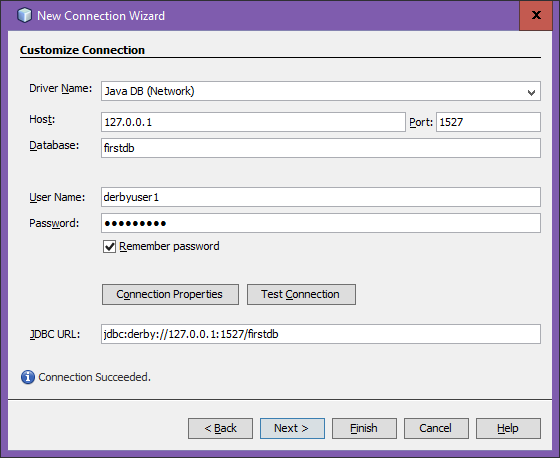
Connecting from NetBeans
After exiting ij, I could successfully connect to firstdb from NetBeans:

Running as a Service with Procrun
In order to use Procrun, you will need to download the native binaries for Windows. (You can also get there by clicking on the Native binaries link on the Procrun page.)
Create a new folder %JDK_HOME%\db\Windows_Service, and extract prunsrv.exe there. Also create two files (obviously pay attention to paths that may be different on your system):
Install_Service.cmd containing:
prunsrv //IS//DerbyService --DisplayName="Derby Service" --Install="C:\Program Files\Java\jdk1.8.0_101\db\Windows_Service\prunsrv.exe" --Jvm=auto --StartMode=jvm --StopMode=jvm --Classpath="C:/Program Files/Java/jdk1.8.0_101/db/lib/derbynet.jar" --StartClass=org.apache.derby.drda.NetworkServerControl --StartParams=start --StopClass=org.apache.derby.drda.NetworkServerControl --StopParams=shutdown
Uninstall_Service.cmd containing:
prunsrv //DS//DerbyService
These two files can then be executed to install or uninstall the service. Once the service is installed, start it up in the usual way.
After starting it, the database no longer existed. This is because the working folder was different, and hence the location where the data is read is different. So I just created the new database one last time, by adding the create=true property to the connection in NetBeans.